Remember this sweater I was raving about a few weeks ago?
Well, mine is done! I've been wearing it almost non-stop since I finished it. It's incredibly warm and cosy; exactly what I was looking for.
My Oshima
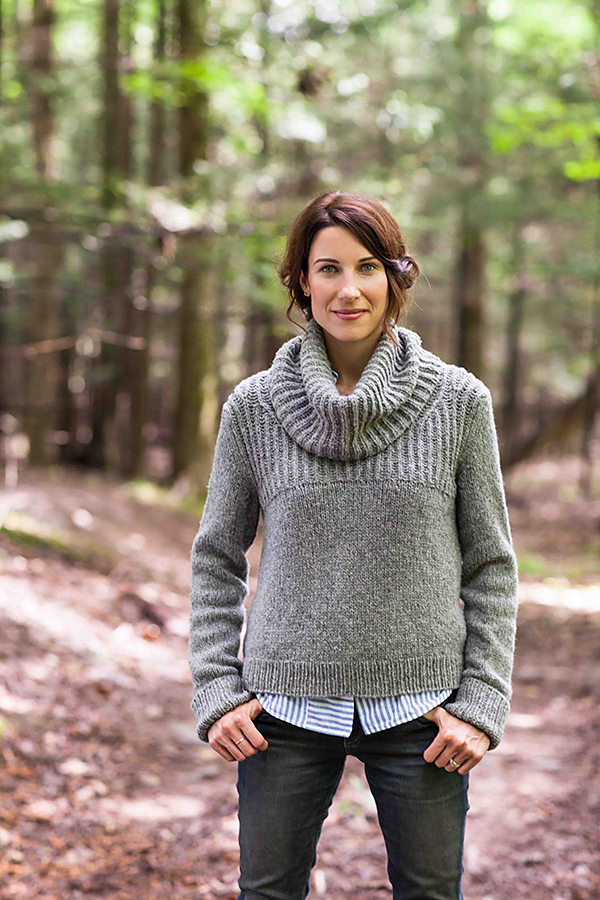
My sister got these pictures for me on Thanksgiving day. Pardon the slightly odd facial expressions - it was really cold outside and I was trying not to look incredibly goofy (which is how I usually look in photos). I'm not really used to people intentionally taking pictures of me. Anywhoo, here's the sweater!
Pattern Review
Ravelry link:
Oak Moss
Size: 38", resulting in 2" of ease
Yarn:
Oasis Yarn Aussie Worsted
This was my first time working with a BrooklynTweed or Jared Flood pattern (Oshima is both). For the most part I was pleased with it. The pattern is quite long (12 pages), as there are many techniques explained in a sort of appendix in the back. Five needle sizes are called for, so it is imperative (isn't it always?) to do a proper gauge swatch and block it like you would the finished sweater. I was able to get away with mostly using 2 sizes: a US 3 for the ribbing and brioche and a US 5 for the main stockinette body and sleeves. I did graduate sizes a bit more for the cowl, as called for.
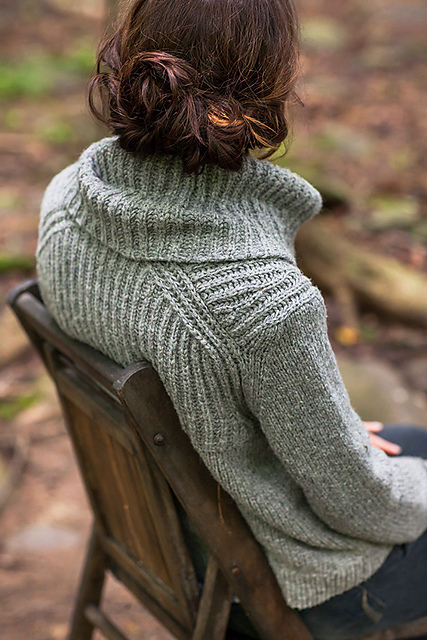
The top half of the sweater is worked in brioche stitch, and the pattern gives top-notch instructions for working it in the round, flat, and with fully-shaped increases and decreases. The result is stunning, and produces a very 'knitterly' sweater. Non-knitters seem to appreciate it, too - Oshima fits right on the line between being fun to knit (and show off to other knitters), and producing an accessible, wearable garment that doesn't scream "I KNIT THIS!" It's the difference between the knowing nod and smile that comes with the "Oh, did you knit that?" kind of remark, and the astounded "wait, you actually KNIT that??" after someone compliments your outfit.
Oshima is made with an interesting construction method. The body is worked circularly from the bottom-up until the underarms, where the front and back are divided. The shoulders are seamed along what looks like a raglan line on your back, so the fronts of the sweater as worked flat are much longer than the back, and wrap over the top of your shoulders when the sweater is worn. Sleeves are then set in and the cowl is picked up and worked circularly.
This is where I had my one and only issue with the pattern. A detailed schematic is included, which shows every measurement on each of the flat pieces. It's very informative! However, no assembly diagram is given for how the shoulder seams should go, or how to line up the sleeves to set them in. Unlike typical set-in-sleeve patterns, the sleeve cap is very angular and definitely contributes to the lines of the garment. I tried to use the closeup shot from the lookbook to position the shoulders:
In the end I'm not completely sure that I got it right, but I'm not sure what I would change or how to get mine to look more like the picture.
You'll notice that my sleeves look much shorter than those in the lookbook photos. That's because I have monkey arms (it's true; we've measured and my arm-span is larger than my height) and I decided to go with the sleeve length specified in the pattern with no alterations. Usually when I'm running around going about my day my sleeves get in the way, so they're pushed up a bit anyway. With the doubled-over cuff, since I didn't tack it down, I can always unfold the cuff if I want to cover my wrists.
Mods
As noted by several of the other knitters who have made this pattern already, the brioche line is a bit odd, as specified - it bisects the torso right in the center of the bust.
While the model manages to pull it off, I didn't think it was a good place for a horizontal line to be. A couple other knitters decided to move the line down, so it hits just under the bust. That looks too much like a babydoll silhouette (which I know from experience is a bad choice for my figure), so I chose to go the other way and move the line up by an inch or so. I like how it turned out.
Yarn
I used
Oasis Yarn's Aussie Worsted, rather than two strands of fingering held double. Price-wise it made more sense for me to use a single strand of worsted. Aussie Worsted is a slightly plumper worsted weight than is typical - it comes in a put-up of 200yds over 100g. In the skein it isn't rough, but feels like your standard untreated 'real' wool. However, after a bath in hot water, it blooms and softens into an incredible fabric. It also comes in a vast array of 54 sophisticated colors. I would definitely use it again.
Overall I'm very pleased with how this turned out! I don't normally go for sweaters with positive ease. This sweater has definitely changed my mind on that. It's comfortable, easy to layer, warm, and it actually works with a lot of my wardrobe.
The End
Happy Friday, everybody! I hope you have some nice weekend plans lined up (or not, if a relaxing do-nothing weekend is in order). Tonight I'm off to watch Christmas movies with family and friends. You can bet I'll be knitting away the whole time, and of course I'll be wearing my sweater :-)