Wednesday, November 27, 2013

WAYM Wednesday: WIP Roundup


Hey everyone! Time for another What Are You Making Wednesday, and I promised a WIP roundup last time, so that's what I'm going to do. I'm not so sure whether anyone is actually interested in how many random in-progress crafty things I have tucked into corners of my house, but this is almost more for my edification: if I publicly list all of my WIPs, it might help incentivize me to finish them before starting on a bunch of new things.

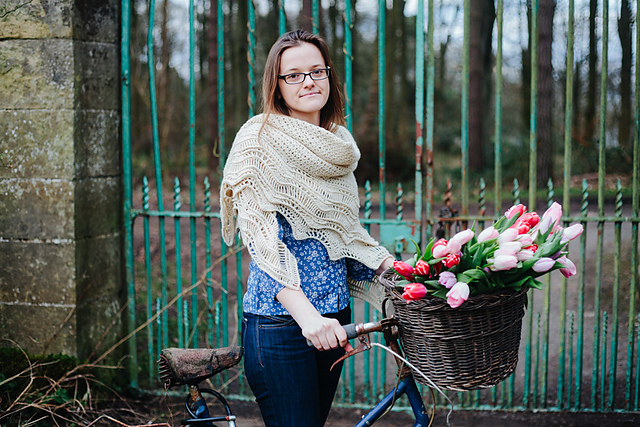
Exciting news: Oshima is no longer on my WIPs list! I'll write up a full FO post and pattern review soon, but for now, here's a teaser photo from my continuing 30x30 challenge:


WIP Roundup


Here's what I've at least started making:

1) Secret Christmas Things

I talked about this last week. Still plugging away. One of my next projects involves dyeing up a bunch of scraps, which is exciting :-)

2) Leopard Blouse

No progress since last week; I haven't had time to sit down at my sewing machine. 


This is a fun project, and it has a lot of potential, but it requires some ripping back right now (and more math) and I just haven't been in the mood for it. I decided a square shawl was not useful, so a long rectangular stole shape would be better. Great idea, but it meant re-doing all of the math for the pattern repeats... and then once the body of the shawl was finished, I skipped the directions to change to a bigger hook size. Bad idea. The thing puckers like crazy and I know it will NOT block out. So, it's been sitting in a bag for a little while. 


I got the yarn specifically for this pattern, swatched and loved how the swatch came out, started right away and got stalled for some unknown reason. I messed up the lace chart a couple of times and had to tink back, which turned it into a not-so-portable project. Then some other big projects entered the scene (sweaters) and the weather started turning, so I made a conscious decision to put this in the "hibernation" pile until Spring. It shouldn't take long to finish it, so I should be able to finish it in time to actually put it to use. With the lace shoulders it doesn't seem suited for layering in colder months. (It's currently also in hiding, so you only get to see a picture of the swatch.)


These are gorgeous. I've finished one glove completely and am up to the hand portion on the second. At this point in the project, though, I was hit with extreme doubt about its usefulness. When would I have use of long, fancy, full-fingered gloves? Unless someone hasn't told me, I haven't been invited to any costume balls lately... So, I'm leaving them in hibernation until I figure that out. The yarn is great, and I wouldn't mind pulling frogging and re-using it, but the gloves are quite elegant and part of me feels like it would be OK if I finished them and they never got used. The other parts of me think that is crazy. 


I started this ages ago after taking Amy Herzog's Fit To Flatter Craftsy class. I highly recommend the class, and I also can now recommend that you should actually follow Amy's advice about wearing ease. I second-guessed her numbers and ended up with something that's a bit too snug on me. It fits, but I unfortunately find the llama content in the yarn just a tad too scratchy for next-to-skin wear on my arms, and it's not loose enough to fit another shirt underneath it. My sister Hannah is just the right size for it though, so I'm hoping to finish it up soon and pass it on to her. 

6) Long Grey Skirt


This is all cut out and ready to go, but I lost a lot of motivation since I started it when it was still summer out and the prospect of wearing the skirt was so far away. Now that it's winter again, I really should pick this back up. All of my skirts are knee-length, which (even with tights) gets chilly. This one is going to go to the floor.

7) Blue floral skirt 


(See center of package - flouncy skirt with pockets & belt loops.) Started this super excited, then lost steam as I started doubting the pattern I had chosen. The fabric is fancy quilting cotton, so it has a fairly nice hand to it but it's very sheer. I'd like to do a full lining on this, but the amount of work that entails has stalled me for the moment. 

8) Brown suit skirt


This one is a real shame - I made one of the skirts from this pattern set as my Very First Skirt Sewing Project (circle skirt, in black suiting material). I still have it and wear it regularly. It's great. The brown fabric here was destined to become the straight, pleat-front skirt shown in the center of the package. However, it seems that in the haze of making my first project, I misplaced or threw out all of the instructions. I have the pattern pieces, just not the cutting layouts or construction notes. Online searches haven't turned up any solutions to my problem. I might just go to Joann's one of these days, pretend to evaluate the pattern, and take a quick read through the notes while at the store. 

9) Spinning

Oh yeah, I suppose my ongoing spinning work counts as a WIP, too.


Like my setup? This is my hi-tech spinning box, aka an old shoebox. It has a couple of nifty holes poked in it, whereby the spindle can be inserted and mounted so that the yarn can be pulled off of it. The tip of the spindle sticks out the side, so I can rest my shoe on it to tension it. A real lazy-kate would be nice.


I got this Merino at Rhinebeck. It spins beautifully - the stuff I used for my first spinning project was an absolute pain to draft, but this drafts and spins like buttah. Very addicting.

I think that's it! 9 isn't too bad. I thought it might be worse once I started actually digging through my craft supplies to see what was in there. There weren't any surprises that I had forgotten about, so that's good. 

What are you making?

Do you tend to be a 'monogamous' crafter, only working on one project at a time until it's complete? Or do you keep several projects going at once, so you can switch between them as your fancy strikes? Do you ever make resolutions to finish x number of projects before starting another one? Come chat in the comments! 

Sunday, November 24, 2013

Recipe: Best Baked Oatmeal

Breakfast.


What comes to mind when you think of that word? My first thought is "ugggghhhh.....I don't even want to think about what I'm going to eat in the morning!" I just want to get out of the door as quickly as possible, and most mornings my stomach is not in the mood for anything fancy (like eggs). However, my metabolism won't let me skip breakfast, so I have to deal with it somehow.

The solution?


Baked Oatmeal


A pan of baked oatmeal contains anywhere from 8-14 servings, depending on how big you need a serving to be. It can be baked once at any time of the day, cooks for only 30 minutes, and after that can live in the fridge for at least a week, unharmed. It reheats beautifully ('cause I don't know about you, but I'm definitely not going to BAKE something for breakfast every morning). It can also be incredibly unhealthy - most of the baked oatmeal recipes I've seen have so much butter and sugar in them that they'd hardly count as a balanced breakfast. In an attempt to have it all I started adjusting recipes until I finally settled on the following, which seems to hit all the marks. 

Recipe


Makes 1 full 13x9 pan, for between 8-14 servings.

Ingredients:


Dry:
  • 6 C old-fashioned (not quick) oats
  • 1/2-1 C brown sugar
  • 4 tsp baking powder
  • 2 tsp cinnamon or blend 
  • 2 tsp salt
Wet:
  • 2 C milk, or soymilk (which is what I use) to make this dairy-free
  • 3/4 C water
  • 2 tsp vanilla extract
  • 4 eggs
  • 1/4 C (1/2 stick) butter

Method:

Place the butter in a 13x9 baking pan, slide it in a cold oven and turn it to 350* while you assemble the rest of the ingredients. The butter will melt while you prepare the recipe. Once the oven is heated, the butter should be just about melted. 

In a large bowl, mix the dry ingredients together. Add the water, milk/soymilk, and vanilla and stir to combine. Add the eggs and stir again. I like to crack each egg into my measuring cup before pouring into the bowl, so I can fish out any shell pieces if necessary. 

Take the hot pan out of the oven, and pour the oatmeal mixture into the pan. Hold the pan with a pot-holder and stir the butter into the rest of the ingredients.

Bake for 30 minutes, or until golden brown on the top and around the edges. 


Eat hot, or let cool and place in the refrigerator for up to 1 week for storage. 

If you cut into the oatmeal while it's still hot, it will be crumbly and loose, but after a night in the fridge it will cut easily into neat squares - great for grabbing and eating on the run if needed!

I like to cut out a square, heat it up in the microwave, and pour some extra soymilk and maybe a little maple syrup on top. 


Enjoy!


Wednesday, November 20, 2013

In Which There Are Many Sneak Peaks

Hello again, and welcome to another WAYM Wednesday!

Today I have a lot of little sneaky closeups of things in progress that I can't tell you about yet. Last year I set out to Make All The Christmas Gifts, which was a lot of fun but required started in May. This year I wanted to focus on smaller but still meaningful gifts, as well as knitting for the people I didn't knit for last year.

Closeups of Secret Things!


Pretty pinked edges
Turned corners
My first time knitting with an 'exotic' fiber. It's pretty awesome.
Hmmm, what's that? Coming up next on the needles...
This one is done. Lovely colors.
This one is also done. Fun with GIMP image filters!

In Other News


My sewing room is finally done being painted and is all back in order. The house feels SO much better now - I hadn't realized how much it was affecting me to have my crafty supplies in total disarray, all over the house, falling in and out of bins, and never where I thought they were, but it was apparently stressing me out. All better now! I promise to post pics of the semi-finished workspace as soon as I get it cleaned up again soon. It is currently a very active space.

Here's my latest sewing-garment-in-progress: the Leopard Blouse. Usually I am not a huge fan of animal prints, but leopard is great.

I've had this top for many years, and I've all but worn it out:


The construction is quite simple, so I thought I'd have a go at drafting a pattern from it and remaking it. If it all works out, I'll share what I did as a tutorial, but for now here are a few work-in-progress shots for you!


Front & back pieces, partially finished
Closeup

Closeup: to the left is the back of the top, which is gathered slightly with an elastic casing, and to the right is the front, which is gathered and finished with a hem facing (to which several ruffles will be attached to match the original).

Oshima


Finally, my Oshima's arms are all attached, and the cowl-neck is well underway. I had some missteps with sewing mattress stitch at first, and had to re-do the sewing a couple of times, but I'm quite happy with how it turned out. You can't even see the seam! Magic. Once the cowl is done all I'll need to do is wet-block it and it will be ready to wear. My goal is to have it done by the end of the week, or at the very least in time to wear on Thanksgiving weekend.


Looking Ahead


When I started this whole adventure, I thought I'd have no problem blogging a few times a week. As you can see from my posts so far that's not really happening...but I'm hoping to step it up as I get better at this. Next week, I PROMISE to at the very least do a WIP roundup on Wednesday. I will hereby document and publish for the world to see my entire collection of in-progress items. I have a feeling it will add up to a lot more than I think once I actually pull everything out. I guess that's the whole point of doing the exercise, though, right?

Till then, happy crafting!


What are you making today?


Wednesday, November 13, 2013

WAYM Wednesday

Almost missed it, but here's my What Are You Making? Wednesday post for this week.

I showcased the Oshima sweater last week, and I'm excited to start assembling the sweater tonight!


I'll talk more about my next project later, but today I'm going to tell you about the first step towards that project, which was to overdye some leftover yarn from my stash to better match a new skein I wanted to showcase.

I've done a couple of experiments with Wilton's Icing Gel dyes, with really exciting results for my first tries. I was not expecting to achieve spectacular results right away, but I was pleasantly surprised! Here's the first project, where I used the hot-pour method via my slow-cooker. The yarn is KnitPicks Bare Merino Silk Fingering and I used Wilton's colors Burgandy, Copper, and Golden Yellow.


My second experiment was kind of weird, but turned out OK, but is currently secret because I have no photographs yet ;-)

For my upcoming project, I just wanted to tone down some silver yarn so that it had a warmer cast. To accomplish this, I decided to try a glazing technique. If you've ever looked at Madelinetosh yarn and wondered how they get such complex, interesting colors, the answer is that they apply several light glazes of color rather than saturating the yarn with a solid tone.

Some Physics

A skein of yarn is really a very long, flexible cylinder. Wool is extremely absorbent, but somewhat resistant to water at first. (This is particularly true of non-superwash wools.) If you have anything made out of real wool, you may have noticed that if you toss it into a body of water it will float for quite a while before sinking. Once it does sink, however, and the fibers completely saturate, it becomes quite heavy (Wiki says wool can hold 3 times its weight in water). These characteristics are important to consider when dying. 

If you fully saturate and soak wool before applying dye, the fibers will all be equally open and receptive to receiving the dyebath. If you don't saturate the wool, the outer fibers along the yarn strand will absorb the dyebath first, before the interior of the strand does. 

A note on color fixing: dye is 'fixed' or made permanent on animal fibers (which are protein-based) by the application of heat and acid. For food-coloring dying, hot enough = just below a simmer, and acid = a tablespoon or two of white vinegar or lemon juice.

With all this in mind, if you wanted to dye some yarn evenly with a solid color, you would 1) pre-soak the yarn (with acid already added, to prepare the fibers completely), 2) add your dye while everything is still cold, and 3) gradually raise the temperature and slowly stir the dyebath so that color is taken up evenly. Changing any of these conditions will give you different results.

Glazing

A 'glaze' of color is just what it sounds like: a light coating of color on the outside of the strand only. So, we want un-soaked yarn and an already-hot, acidic dyebath, so that color will be absorbed on the outside of the strand first (un-soaked yarn) and fixed right away (hot acidic dyebath).

A Caveat

This is officially my THIRD time dying wool in my kitchen with Wilton's Icing Gel dyes. There are tons of tutorials out there; I highly recommend www.dyeyouryarn.com as a great resource for color recipes and tutorials for various methods. Googling will turn up lots of information. I'm not an expert; but everything I've tried so far has been the opposite of disastrous and was a lot of fun. The great thing about food coloring as a yarn dye is that it's completely food-safe, so you don't need special, reserved pots & other materials and there are no dangerous chemicals to worry about.

What I Made


Before dying:


The yarn on the left is the new skein I want to match, and the yarn on the right is the silver yarn that I dyed in this experiment. The small bit on the top was a sample, made by doing a super-fast test in the microwave.

Here's a pic of the Wilton's Icing dye. I found it at Michael's, and for this project I used the color "Brown". Imaginative name, huh?


The Process

Step 1 is to get the yarn in hank form. I took pictures to show how I do it. There are lots of great tools for making this easier, but I don't have any of those yet...a couple of chair backs pushed together works OK. 


Start by taping the end of the yarn to one of the chairs. Don't tie this to anything yet; we'll need it later. 

Proceed to wind the yarn around the chairs in a big circle. Don't pull too tightly or it will be very hard to remove. 

Once that's done, use the free end to tie a figure-8 knot through the strands. You can see what this looks like in the picture below - separate the yarn into 3 sections with your fingers, and weave the end over & under & over & under ... until you're back at the start. Tie off to finish. Repeat with the taped starting strand. Pull the yarn off of the chair backs, and use some cotton or twine to tie the yarn off in a few other places.

Ta-da, a hank of yarn!


Dyeing Time

Here's my setup:


Dry yarn to the left, dyebath in the middle consisting of hot-from-the-tap water and a hefty glug of white vinegar. 


Here it is with the dye dissolved. This pic shows the dyebath with about 3 toothpick-coatings of dye dissolved. I ended up re-saturating the dye bath a few times, so if I were doing this again I would start with a stronger bath of maybe a teaspoon of dye. 


My hot-from-the-tap water was pretty hot, so I knew that the yarn would start absorbing color right away and went ahead and submerged the yarn before applying more heat. The bowl should be covered with cling-wrap to keep most of the steam that we'll generate inside, but leave a vent so it doesn't explode. I proceeded to microwave the bowl for 2 minutes or so, until it was steamy.


Here you can see that the water is clear - this is a sign that the dyebath has 'exhausted', and all of the color is in the yarn where we want it to be. At this stage, the color should be totally set. 

Not pictured: since my first dyebath was not as saturated as I wanted, I re-did this process 2 more times by removing the yarn to another bowl, adding more dye to the water, and putting the yarn back in. 

Handling hot, non-superwash wool is a recipe for felting, so many people like to leave the yarn in the dyebath to cool to room temperature before touching it. I am not that patient, however, so I like to pull it out and drain it in a colendar. It cools much faster this way. Just make sure not to agitate it at all at this stage, until it is cool. 


Once cool, it's a good idea to test the color-fastness of your end produce by giving it a good soak in some woolwash. 


It's hard to tell because I have a brown sink, but the water is clear here after 15 minutes, so we're all set. Drain the yarn and press out any extra water with a clean towel.

Hang to dry.


The Reveal

Here's the final product:


As you can see, I mostly got what I wanted - the yarn does appear to be glazed with brown on top of the silver, and you can still see the silver poking through in several places. I'm pretty happy with it!

If you stuck with me this far, thanks for reading :-) This was a long post - I went back and forth between whether I should just post before&after photos and call it a day, or do a full-blown tutorial. I ended up somewhere in between. Hope you enjoyed, and I'll hopefully be back with another post before the next WAYM Wednesday rolls around.

Your turn - what are you making? I'd love to hear about it in the comments!


Wednesday, November 6, 2013

"What are you making?" Wednesday

In the crafty blogosphere, there are several named days of the week when participating blogs all unite on a particular topic. They usually have some alliteration to them. The ones I'm most familiar with are WIP Wednesday and FO Friday. WIP = "work in progress" and FO = "finished object".

It's a fun idea, and I thought about joining the blogroll, but then it hit me - "What are you making" also starts with W, and has the fun acronym WAYM, which is fun to say if you pronounce it as "wha-yahm". So let's start a new thing! I hereby present What Are You Making Wednesdays, where I will hopefully post about stuff I'm working on right now. I might decide to do a roundup of all my WIPs, or post about a couple things, or just one thing that I'm really excited about. Today I'm going to do the latter.

This is Oshima.


The back of the sweater is really stunning:


Oshima comes from the latest installment from Brooklyn Tweed, which I've been following for a while but had yet to actually make any of their garments. All of them are stunning. Each lookbook they produce, without fail, makes me want to pick up my needles and Knit All The Things. This one in particular caught my eye - I've been wanting something to wear exactly the way it's pictured here. Sweatshirts are not good for me. When I wear them I feel like a kid and am sometimes mistaken for one (recently, a cable salesperson rang my doorbell and *almost* asked to speak to my parents). But this has all the casual ease and comfort of a sweatshirt while also looking awesome and put together. It also offered an opportunity to work on my brioche knitting skills, which previously consisted of "I knit a scarf that one time". The icing on the cake? Cowl neck. Wonderful things, cowl neck sweaters. 

When I went to Rhinebeck Sheep & Wool festival a couple weeks ago, this was one of the objects on my shortlist of "stuff to acquire supplies for". Acquire I did, and I cast on the next day.


This is Oasis Aussie Worsted. So far, I absolutely love it. Smooth and easy to work with, not superwash, kind of a standard sweater wool, and it's just ever so slightly puffier than a regular worsted (the put-up is 200 yds / 100 g). When washed, it puffs up even more and relaxes into a very soft and squishable fabric. I would definitely work with this again.

The following week I had 3 full days of classes at work, with a teacher who very amicably told me it was completely fine if I knitted during lectures, "as long as I didn't mind listening to his yarns", yuk yuk yuk. By the time that week was over, this had happened:


And now, a week after that, the body is entirely done, washed, and blocked, and the sleeves are well on their way.


(No pic of the sleeves at the moment, but I'm working them 2-at-a-time and I'm about 9-10 inches in.)

It's getting cold out and I can't WAIT to wear this sweater. It's gonna be great. 

P.S. here's my 30x30 outfit for the day. Ignore the very unflattering wrinkles - this was after I got home from my 1.5 hour commute (which should only take 30 minutes)...